You have a design. Maybe it’s a sketch on paper, a mood board on your phone, or a vision so clear you can practically feel the fabric. What you don’t have yet is a clue about how that idea becomes 500 units of finished clothing, tagged, folded, and ready to ship. You’re not alone. Most first-time brand founders assume custom apparel manufacturing is just “send a design, get clothes back.” The reality is more layered, more technical, and honestly, more fascinating than that. Understanding the process isn’t just helpful it’s the difference between a brand that launches on time and one that gets stuck in a loop of expensive sample revisions and missed deadlines.
This guide walks you through exactly how custom apparel manufacturing services work from concept to delivery in plain language, with every step explained. Whether you’re building a DTC streetwear label, a corporate uniform line, or a performance activewear brand, this is the roadmap you need before you ever contact a factory.
What Is Custom Apparel Manufacturing?

Custom apparel manufacturing is the process of producing clothing built entirely to a brand’s specifications not from pre-made blanks, not from a generic catalogue. Every element is defined by you: the fabric weight, the fit, the colorways, the labels, the packaging.
This is different from three alternatives that often get confused with it:
| Model | What It Means | Best For |
| Custom Manufacturing | Garments built from scratch to your spec | Brands wanting full design control |
| Private Label | Factory’s existing design with your branding applied | Speed-to-market, lower development cost |
| Print-on-Demand | Pre-made blank + digital print per order | Solo creators, zero inventory risk |
| Wholesale | Buy existing stock in bulk | Retail resellers, not brand-builders |
Custom apparel manufacturing services are used by startups launching their first collection, established brands scaling new categories, corporations sourcing branded uniforms, and sportswear companies developing technical performance gear.
The key advantage? Complete ownership of your product identity from the fabric’s hand feel to the last stitch on the hem.
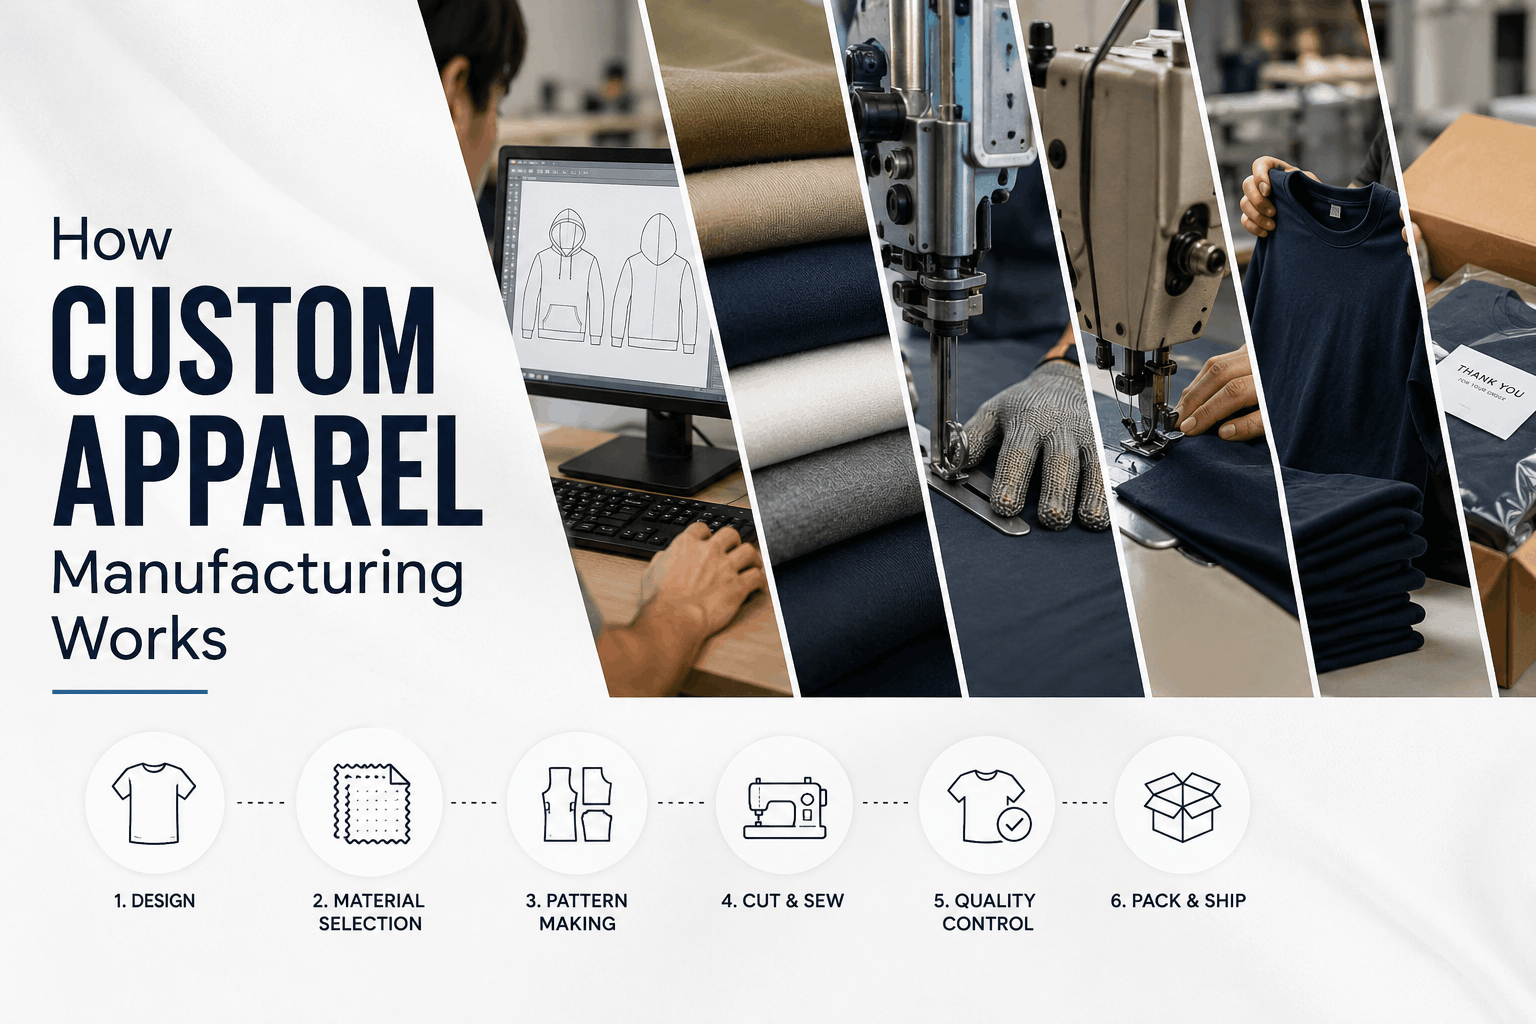
The Custom Apparel Manufacturing Process Step by Step
Here is exactly how the process works, from your first sketch to finished garments arriving at your warehouse.
Step 1: Concept Development & Design
Every production run begins with clarity. Before a factory can do anything for you, they need to understand precisely what you’re making.
Your design inputs can take several forms:
- A hand sketch with written annotations
- A mood board combining reference images and fabric swatches
- A reference sample a garment you want to replicate or adapt
- A CAD (Computer-Aided Design) drawing the most factory-friendly format
At this stage, the more detail the better. Factories are not mind-readers. A vague brief leads to a prototype that misses the mark, which costs you time and money in revision rounds. Define your target customer, the garment’s intended use, the silhouette, the fit (relaxed, slim, oversized), and any technical requirements upfront.
Pro tip: If you’re working with a manufacturer overseas, language barriers make visual precision even more critical. A clear sketch with labeled callouts is worth more than a paragraph of description.
Step 2: Creating the Tech Pack
The tech pack is the single most important document in custom apparel manufacturing. Think of it as the architectural blueprint for your garment a complete, factory-readable specification that removes all guesswork from the production process.
A well-built tech pack includes:
- Technical flat sketches front, back, and detail views
- Bill of Materials (BOM) every component: shell fabric, lining, thread, zippers, buttons, labels, drawcords, and packaging
- Measurements & tolerances exact dimensions for each size in the range
- Construction specs stitch type, seam allowance, SPI (stitches per inch), seam finishes
- Colorways Pantone references, not just color names
- Placement details where every label, logo, and embellishment sits, with measurements
The terms tech pack, specification sheet, spec sheet, and BOM are sometimes used interchangeably but they’re not identical. The tech pack is the full package. The BOM is one component within it. The spec sheet refers specifically to the measurements page.
Without a solid tech pack, your first sample will almost certainly come back wrong. With one, you give the factory everything they need to execute your vision precisely and you have a reference document to hold them accountable to throughout production.
Step 3: Fabric Sourcing & Material Selection
Once your tech pack is confirmed, sourcing begins. This is where many production timelines slip, because fabric lead times can easily exceed the time it takes to cut and sew the garment itself. Plan early.
Key fabric decisions include:
- Fiber type: Cotton, polyester, nylon, bamboo, blends, or performance synthetics
- Construction: Woven vs. knit woven fabrics don’t stretch; knits do
- Weight: Measured in GSM (grams per square metre) heavier GSM = more substantial fabric
- Sustainability: TENCEL™, recycled polyester, organic cotton, and other eco-materials are now widely available through most mid-to-large manufacturers
Alongside the shell fabric, your manufacturer will source trims everything that isn’t the main fabric: zippers, buttons, snaps, elastics, drawcords, woven labels, care labels, heat transfer labels, and hang tags. Every trim specified in your BOM needs to be sourced and approved before sampling begins.
Color approvals happen here too. For solid fabrics, the factory sends lab dips small dyed swatches for you to approve against your Pantone reference. For printed fabrics, they send strike-offs test prints for approval before the full production yardage is printed.
Don’t rush this stage. A wrong fabric or an unapproved colorway discovered during bulk production is far more expensive to fix than catching it here.
Step 4: Pattern Making & Grading
With materials confirmed, the factory’s pattern maker takes your tech pack and converts the design into cut-ready shapes the precise geometric templates from which your garment is assembled.
Pattern making is both technical and interpretive. A skilled pattern maker doesn’t just follow measurements mechanically they understand how fabric behaves, how seams interact, and how a garment moves on a body. For performance apparel like activewear, this expertise is critical: stretch percentage, recovery, and range of motion must all be built into the pattern.
Once the base pattern is set (usually in a middle size), it’s graded proportionally scaled up and down across your full size range. Accurate grading ensures fit consistency across every size, not just the sample size. Inconsistent grading is one of the most common quality issues brands discover too late in bulk production.
CMT (Cut, Make, Trim) is the factory’s labor cost for this entire physical production phase: cutting the fabric to pattern, sewing the pieces together, and adding all finishing trims. It’s quoted per unit and forms a core component of your cost-per-unit alongside the BOM.
Step 5: Sampling
Sampling is the most iterative and most misunderstood part of the process. It’s not just “getting a prototype made.” It’s a structured series of checkpoints that progressively refine your garment before committing to bulk production.
The standard sampling process runs through three stages:
Proto / Toile Sample The first physical interpretation of your design, often made in a stand-in fabric. You’re not evaluating the final look you’re checking the shape, construction, and structure. Is the silhouette right? Are the proportions correct?
Fit Sample Made in the correct fabric (or the closest available substitute), in your base size. Now you put it on literally. Evaluate the fit across the body, identify what needs adjusting: the shoulder seam, the hem drop, the sleeve pitch, the rise. Detailed, precise written feedback at this stage prevents a third round of samples.
Pre-Production (PP) Sample The most important sample. Made in the confirmed fabric, confirmed trims, and confirmed construction. This is the exact garment the factory will replicate across your entire production run. Once you sign off on the PP sample, it becomes the legal and quality benchmark the reference against which every unit will be measured during bulk production. Do not rush this approval.
Most brands should budget for two to three sample rounds. Experienced brands with clean tech packs sometimes achieve approval in two. Complex or highly technical garments may require more.
Step 6: Costing & MOQ Negotiation
With your PP sample approved, the commercial conversation closes out. Your cost per unit is built from several components:
| Cost Component | What It Covers |
| Fabric cost | Yardage × price per metre/yard |
| CMT | Cut, Make, Trim factory labor per unit |
| Trims | Zippers, labels, buttons, packaging materials |
| Embellishments | Embroidery, printing, washes, special finishes |
| Factory margin | Factory’s operational overhead and profit |
These combine into your FOB price (Free on Board) the price per unit loaded onto the ship at the origin port. From FOB you add freight, duties, and customs to arrive at your total landed cost.
Minimum Order Quantities (MOQs) define the minimum number of units a factory will produce per style, per colorway. This exists because factories have fixed setup costs cutting fees, sample stitching, machine setups that only become economical above a certain volume.
Standard MOQs by manufacturing region:
- China / Bangladesh / Vietnam: 300–1,000 units per style
- Portugal / Turkey: 100–500 units per style
- USA / nearshore: 50–300 units per style
- Startup-specialist manufacturers: As low as 50 units per style
If your budget or market test requires lower quantities, seek manufacturers who explicitly offer startup-friendly MOQs and factor in that lower volumes typically mean a higher cost per unit.
Step 7: Bulk Production
With the PP sample signed off, MOQ confirmed, pricing agreed, and a deposit paid, your production slot is booked. This is when manufacturing begins in earnest.
What happens on the factory floor:
- Fabric spreading & cutting: Rolls of approved fabric are layered and cut to your confirmed patterns using industrial cutters or, in modern facilities, laser-cutting technology. Precision here minimizes fabric waste and ensures consistency across pieces.
- Stitching & assembly: Cut pieces move through a production line where operators each handle a specific part of the build one person assembles the body, another attaches sleeves, another adds the hem. Each follows the construction specs in your signed-off tech pack.
- Finishing & embellishments: Printing, embroidery, garment washes, or other treatments are applied either inline during production or as a separate finishing step, depending on the technique.
- Pressing & folding: Finished garments are steamed, pressed, and prepared for quality inspection.
Throughout this process, inline QC (quality control) happens continuously not just at the end. Supervisors check work-in-progress at multiple points during the run, catching fit, stitching, or construction issues before they compound across the full order.
Step 8: Final Quality Control & Inspection
Before any garment ships, it goes through a formal end-of-line inspection. This is where every finished unit is checked against your approved PP sample.
What gets inspected:
- Measurements (checked against your graded spec sheet, size by size)
- Stitching quality stitch density, seam strength, thread tension
- Construction correct assembly, no skipped seams or open edges
- Colorways consistency across units and against approved lab dips
- Trims correct hardware, correct labels, correct placement
- Visual defects pulls, snags, pilling, staining
- Packaging correct folding, tagging, polybag or hangtag as specified
Most professional manufacturers conduct inspections using AQL (Acceptable Quality Level) sampling standards a statistically derived system that defines how many units to inspect and what defect rate is acceptable. For orders where quality is critical, brands can also hire independent third-party QC agencies (SGS, Bureau Veritas, QIMA) to conduct inspections on-site at the factory.
Step 9: Packaging, Labeling & Delivery
The final stage before your goods leave the factory:
- Branding & labeling: Woven neck labels, care labels, size labels, hang tags, and branded polybags or boxes are applied and packed to your specifications
- Carton packing: Garments are packed into export cartons with specified assortments (sizes, colorways per carton) and labeled with shipping marks
- Shipping terms: Under FOB, the factory is responsible until goods are loaded onto the vessel. Under LDP (Landed Duty Paid), the supplier handles all freight, customs, and delivery the simplest option for first-time importers
Typical lead times by region:
| Sourcing Region | Sampling | Bulk Production | Shipping to UK/EU |
| China | 4–6 weeks | 6–10 weeks | 3–5 weeks |
| Bangladesh | 5–7 weeks | 6–10 weeks | 3–4 weeks |
| Portugal | 3–5 weeks | 4–7 weeks | 1 week |
| USA (domestic) | 2–4 weeks | 4–6 weeks | 1–3 days |
How Long Does Custom Apparel Manufacturing Take?
End-to-end, from approved tech pack to goods in your hands, the full custom apparel manufacturing timeline typically runs 14 to 24 weeks. Here’s how that breaks down:
| Stage | Typical Timeframe |
| Tech Pack Development | 1–2 weeks |
| Fabric & Trim Sourcing | 2–4 weeks |
| Sampling (all rounds) | 4–8 weeks |
| MOQ / Costing Confirmation | 1 week |
| Bulk Production | 4–10 weeks |
| Final QC & Inspection | 1 week |
| Shipping & Customs | 1–5 weeks |
| Total | ~14–24 weeks |
What speeds it up:
- A complete, accurate tech pack from day one
- Decisive, fast feedback on samples
- Working with a manufacturer who has your fabrics in stock
- Choosing a nearshore or domestic factory
Things that slows it down:
- Vague or incomplete design briefs
- Multiple rounds of sample revisions
- Fabric sourcing delays (especially custom-milled materials)
- Peak factory seasons (Chinese New Year, Eid holidays near key manufacturing hubs)
What Does Custom Apparel Manufacturing Cost?
Cost varies widely depending on garment complexity, fabric selection, order volume, and manufacturing location. Here’s a realistic framework:
Typical cost-per-unit ranges (FOB, medium MOQ):
| Garment Type | Low MOQ (100–200 units) | Standard MOQ (500+ units) |
| Basic T-Shirt | $8–$14 | $4–$8 |
| Hoodie / Sweatshirt | $18–$28 | $12–$18 |
| Performance Activewear | $22–$38 | $14–$24 |
| Outerwear / Jacket | $35–$70 | $22–$45 |
Hidden costs first-timers often miss:
- Sampling fees: $50–$300 per sample, per round (some factories credit this against your order)
- Tech pack development: $150–$500 if you outsource this to a freelance technical designer
- Shipping & freight: 10–25% on top of FOB depending on volume and destination
- Import duties: Vary by country of origin and garment category
- Third-party QC inspection: $200–$400 per inspection day
The golden rule: Don’t optimize for the cheapest per-unit price. Optimize for cost per sellable unit factoring in defect rates, revision rounds, and the brand damage of poor quality.
How to Choose the Right Custom Apparel Manufacturer
The right manufacturer isn’t just the cheapest or fastest it’s the one whose capabilities, values, and communication style align with your brand’s needs.
Checklist for vetting a manufacturer:
- Do they have experience in your specific garment category (activewear, outerwear, basics)?
- What is their minimum order quantity, and does it fit your current stage?
- Can they share references or a portfolio of past brand clients?
- What certifications do they hold? (GOTS, OEKO-TEX, SA8000, ISO 9001)
- How is communication handled dedicated account manager, WhatsApp, email?
- What is their sampling turnaround and revision policy?
- Do they offer end-to-end services (design support, sourcing, QC, shipping) or CMT only?
- Have they worked with brands at your scale before?
Local vs. overseas the honest trade-off:
Overseas factories (China, Bangladesh, Vietnam, India) offer significantly lower CMT costs and can handle high volumes but come with longer lead times, potential language barriers, and greater IP exposure risk.
Nearshore or domestic factories (Portugal, Turkey, USA, UK) offer faster turnaround, stronger IP protection, “Made in [Country]” brand equity, and easier communication but at a higher per-unit cost.
Neither is universally better. The right choice depends on your price point, your timeline, your order volume, and what your customer values.
Red flags to walk away from:
- A manufacturer who dismisses the tech pack or “doesn’t need it”
- Unusually low quotes that seem too good to be true
- No sample policy or unwillingness to provide references
- Slow, unclear communication before you’ve even placed an order
Frequently Asked Questions
What is a tech pack, and do I need one?
Yes absolutely. A tech pack is the complete specification document for your garment: sketches, measurements, materials, construction details, and labeling instructions. Without one, factories are guessing. A well-built tech pack reduces sample rounds, reduces costs, and protects you if quality disputes arise.
What is the minimum order quantity for custom apparel manufacturing?
It depends on the manufacturer and region. Most mid-size overseas factories require 300–1,000 units per style. Startup-specialist manufacturers offer MOQs as low as 50 units, typically at a higher cost per unit. Always confirm MOQ per style and per colorway they are often different.
How is custom manufacturing different from private label?
Custom manufacturing builds your garment from scratch to your exact specifications. Private label takes an existing factory design and applies your branding. Custom gives you full design ownership; private label gets you to market faster and at lower development cost.
What does CMT mean in garment manufacturing?
CMT stands for Cut, Make, Trim the three core labor operations in garment production. It represents the factory’s cost to cut the fabric, sew the garment, and add all finishing trims. CMT is quoted per unit and is one of the main components of your cost price alongside fabric and trims.
Can I get custom apparel made with a low MOQ?
Yes, but you’ll pay more per unit. Manufacturers who specialize in startups and small-batch orders (often in Portugal, Turkey, or the USA) offer MOQs of 50–200 units. This is worth it for testing a new style before committing to volume.
What certifications should I look for in an ethical clothing manufacturer?
The most widely recognized are: GOTS (Global Organic Textile Standard) for organic materials, OEKO-TEX Standard 100 for chemical safety, SA8000 for labor rights and working conditions, and BSCI or SEDEX for supply chain ethical auditing.
Conclusion
The journey from sketch to stitch is longer and more layered than most people expect but it’s entirely navigable once you understand the map.
A clear design brief feeds a solid tech pack. A solid tech pack drives accurate sampling. Accurate sampling leads to clean bulk production. And clean bulk production means garments that arrive on time, on spec, and ready to sell.
You don’t need to master every technical detail overnight. What you need is a manufacturer who communicates clearly, a process you trust, and the patience to move through each stage properly rather than rushing toward the finish line.

Ready to bring your designs to life? Our custom apparel manufacturing services handle everything from tech pack development through to final delivery with startup-friendly MOQs and transparent pricing at every step.